GitHub Enterprise integration with Jira: a step-by-step tutorial
Teamwork is an important element of the modern workplace and two of the best tools to enhance collaboration and cooperation are GitHub and Jira. While GitHub allows writing code with fellow colleagues and controlling versions, Jira is great for advanced time management due to multiple features it provides. So wouldn’t it be great if we could get the best of both tools at the same time and bring development and project management together? There are a lot of apps out there that will help you integrate Jira and GitHub, however, the fact that you can use third-party apps doesn’t mean that you should. We have prepared a step-by-step guide that will help you connect these two important tools without a single line of code or third-party apps. See all information about your branches, pull requests and commits in Jira and make working on projects more efficient.
Note: The following steps have been tested for GitHub Enterprise Cloud and Atlassian Jira Software v8.2.0, but we expect them to work with all versions of Jira Software 8.*.*.
Requirements: system admin rights for GitHub and Jira
Step 1 (GitHub)
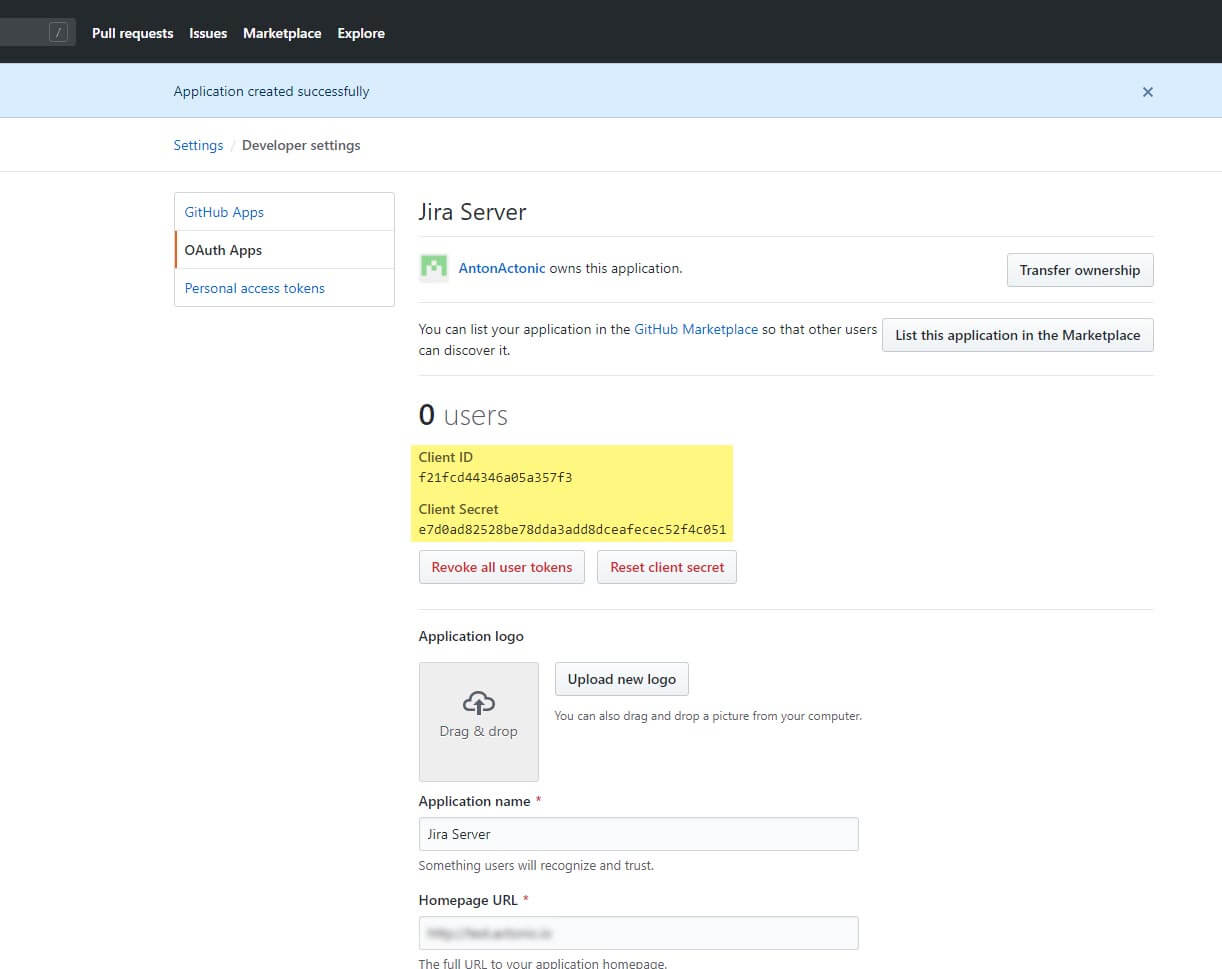
1. In order to connect your GitHub and Jira, you need to have an OAuth access token for the account that has administrative rights for the repository. Thus you will get a “Client ID” and a “Client Secret”.
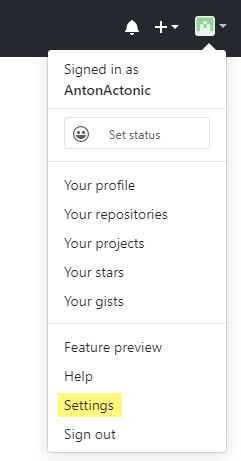
2. In order to get a “Client ID” and a “Client Secret”, go to the GitHub site and click on the avatar in the top right-hand corner → select “Settings” in the drop-down menu and click “Developer settings”.
3. Select “OAuth Apps”
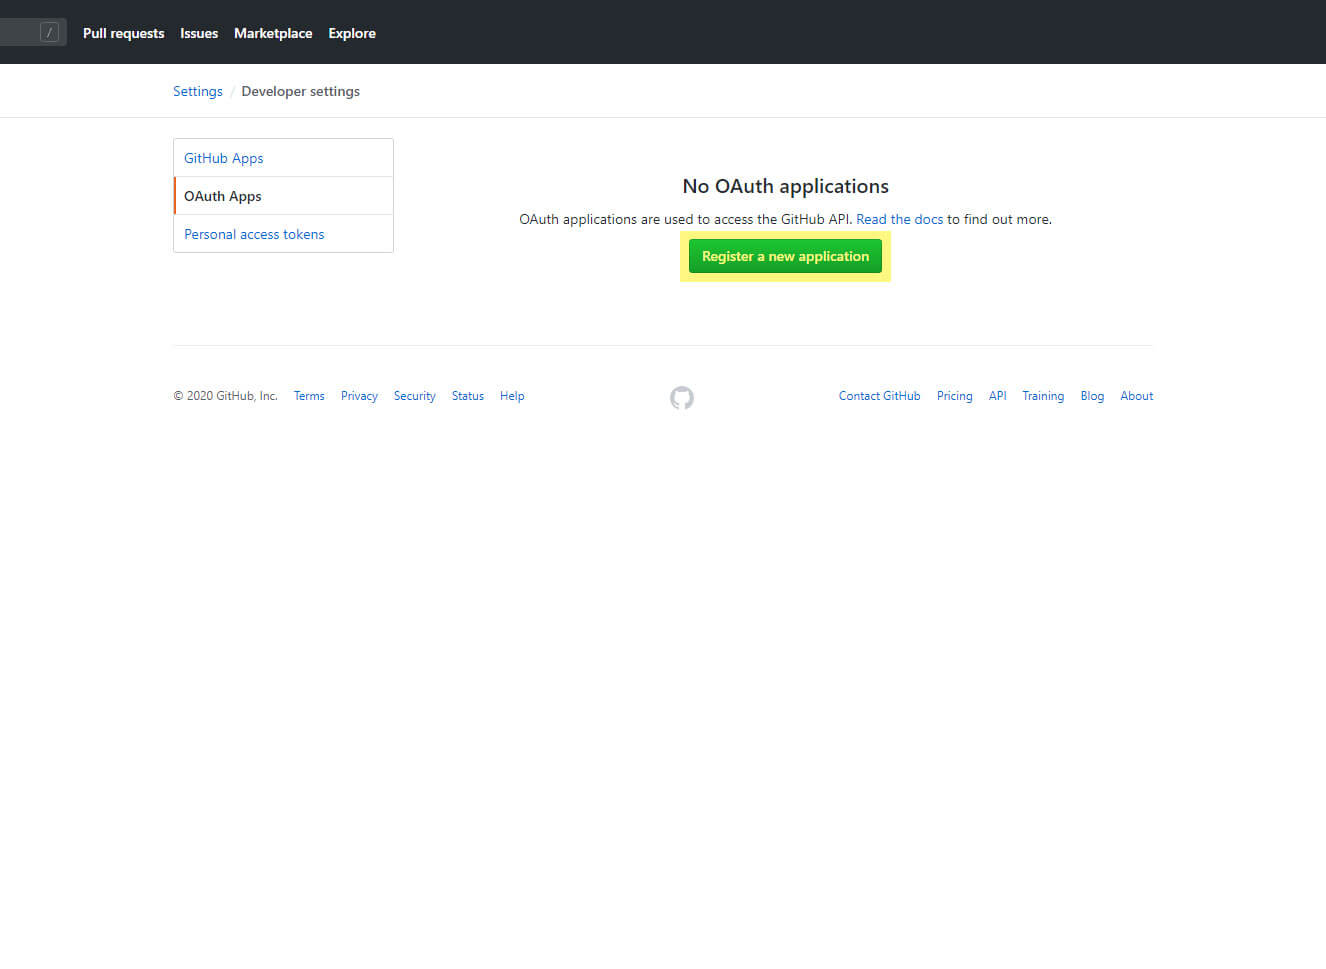
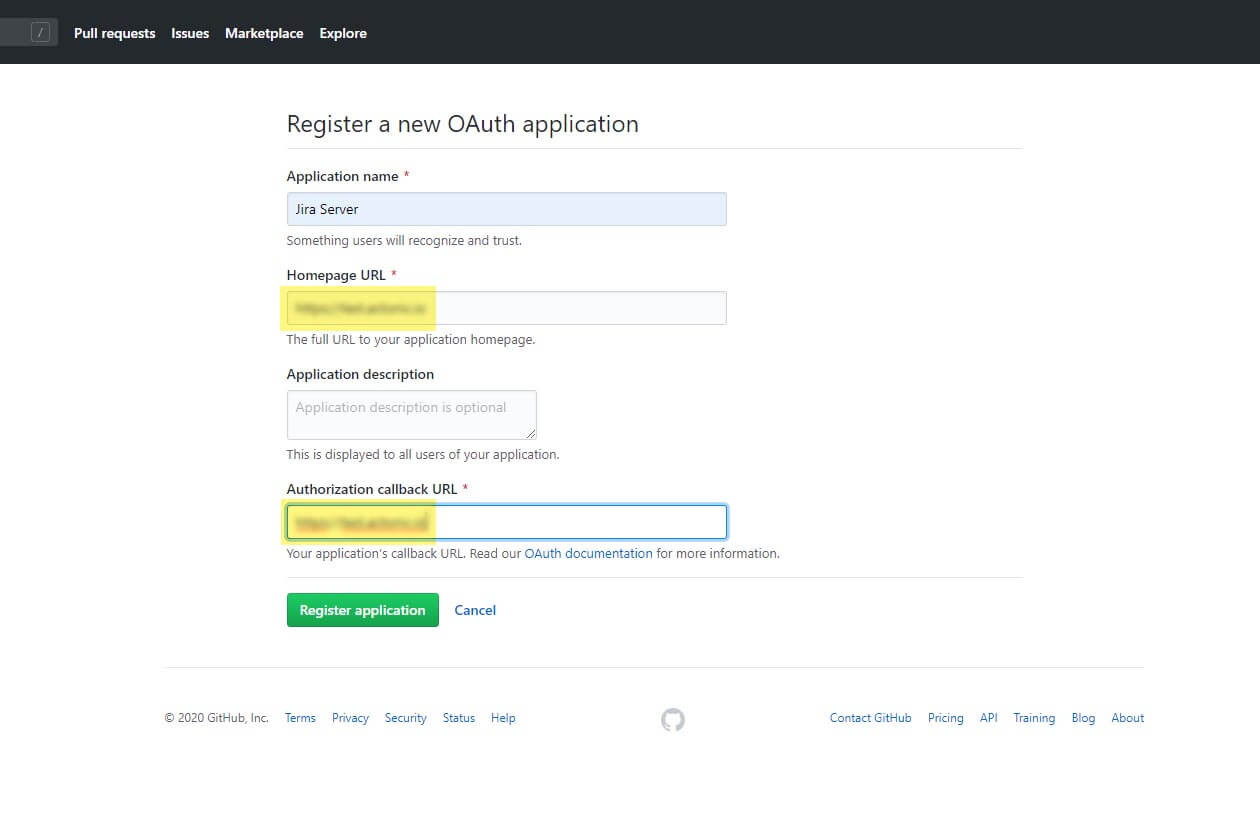
and click “Register new application“
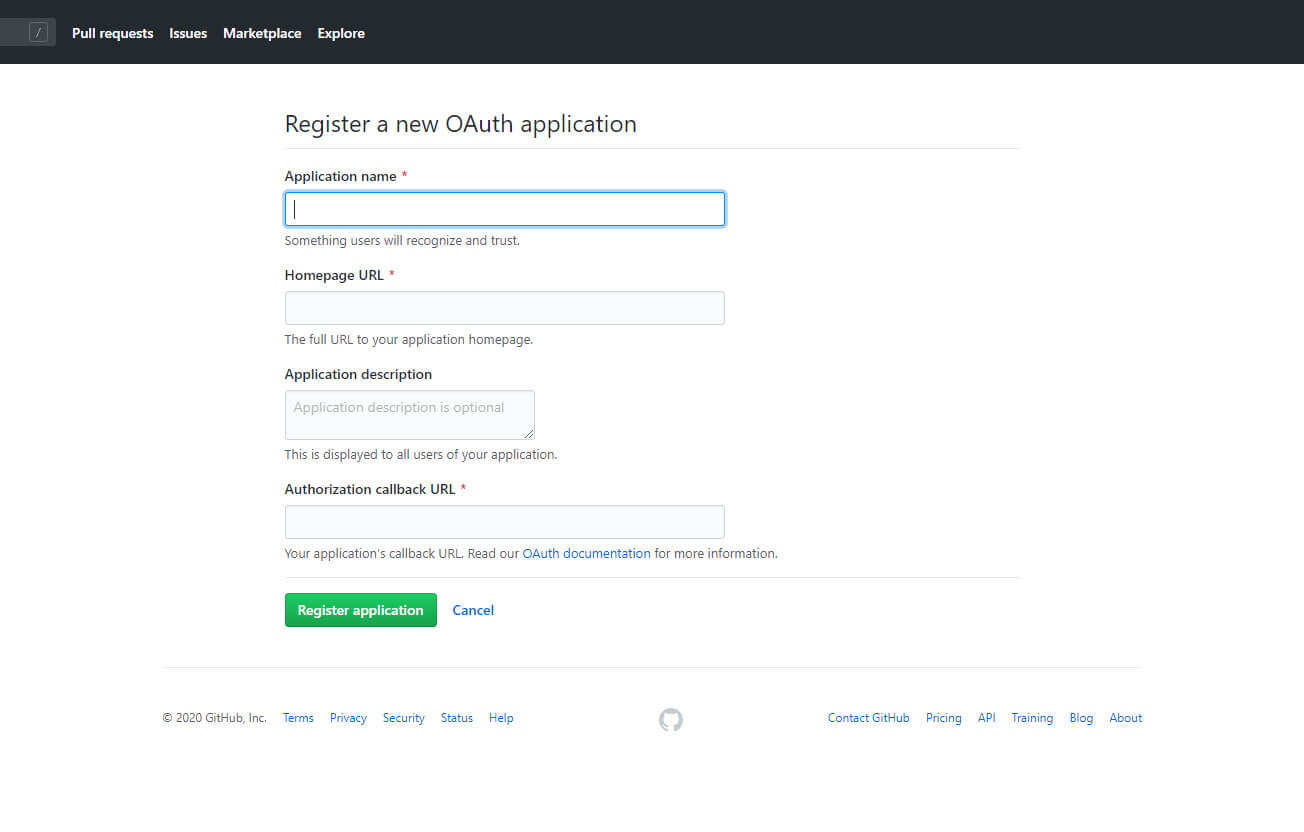
You can choose any “Application name”, but the best practice is to use “Jira Server”, since we have a connection to a Jira server, or the name of the instance if it has a name.
4. Fill out the details. Homepage URL = Authorization callback URL = Base URL of the Jira instance. You can find it in your Jira system information here:
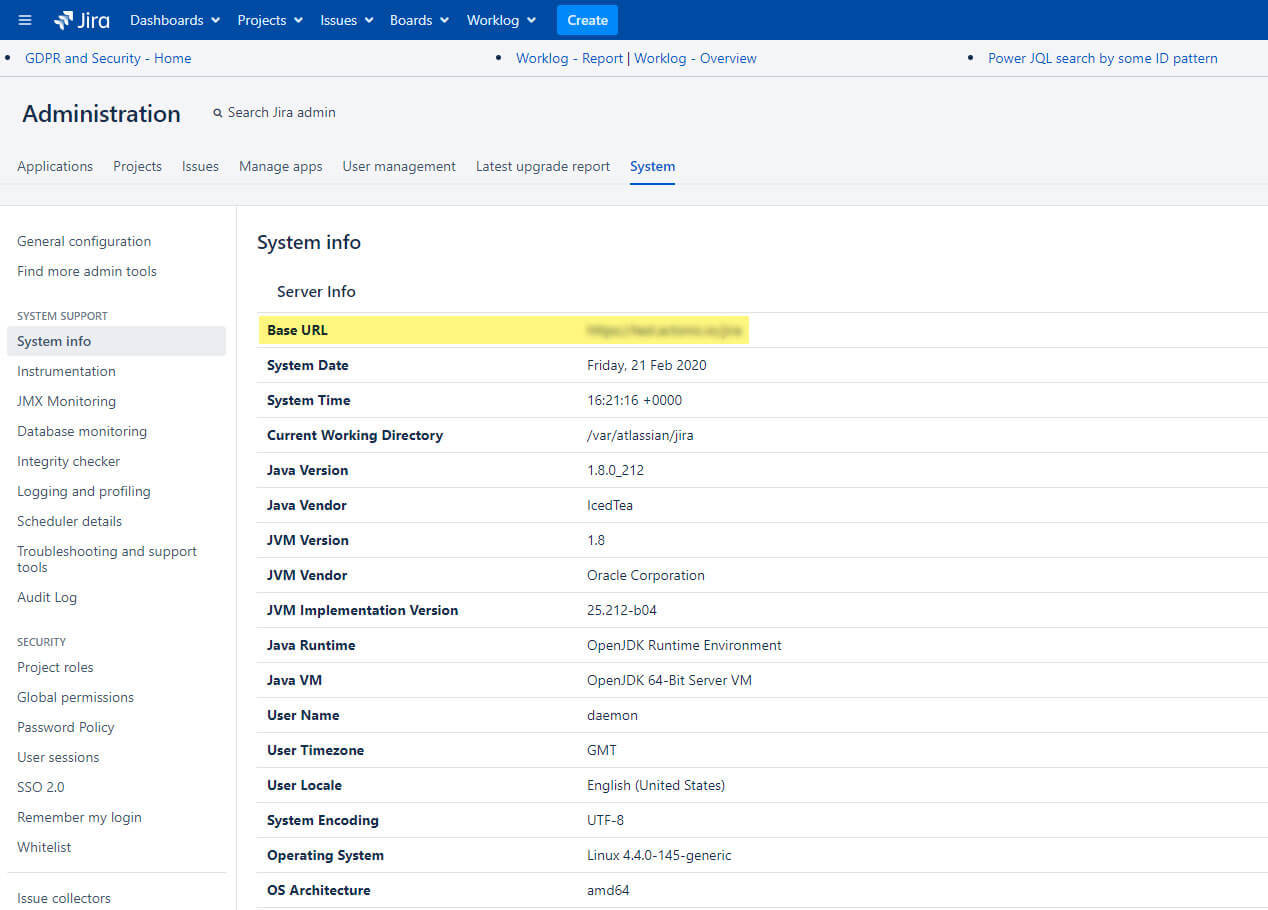
Click the Application tab and you will see the “Client ID” and “Client Secret”:
IMPORTANT:
Open Jira and GitHub as two tabs in the same browser window
Step 2 (Jira)
Requirements: admin rights
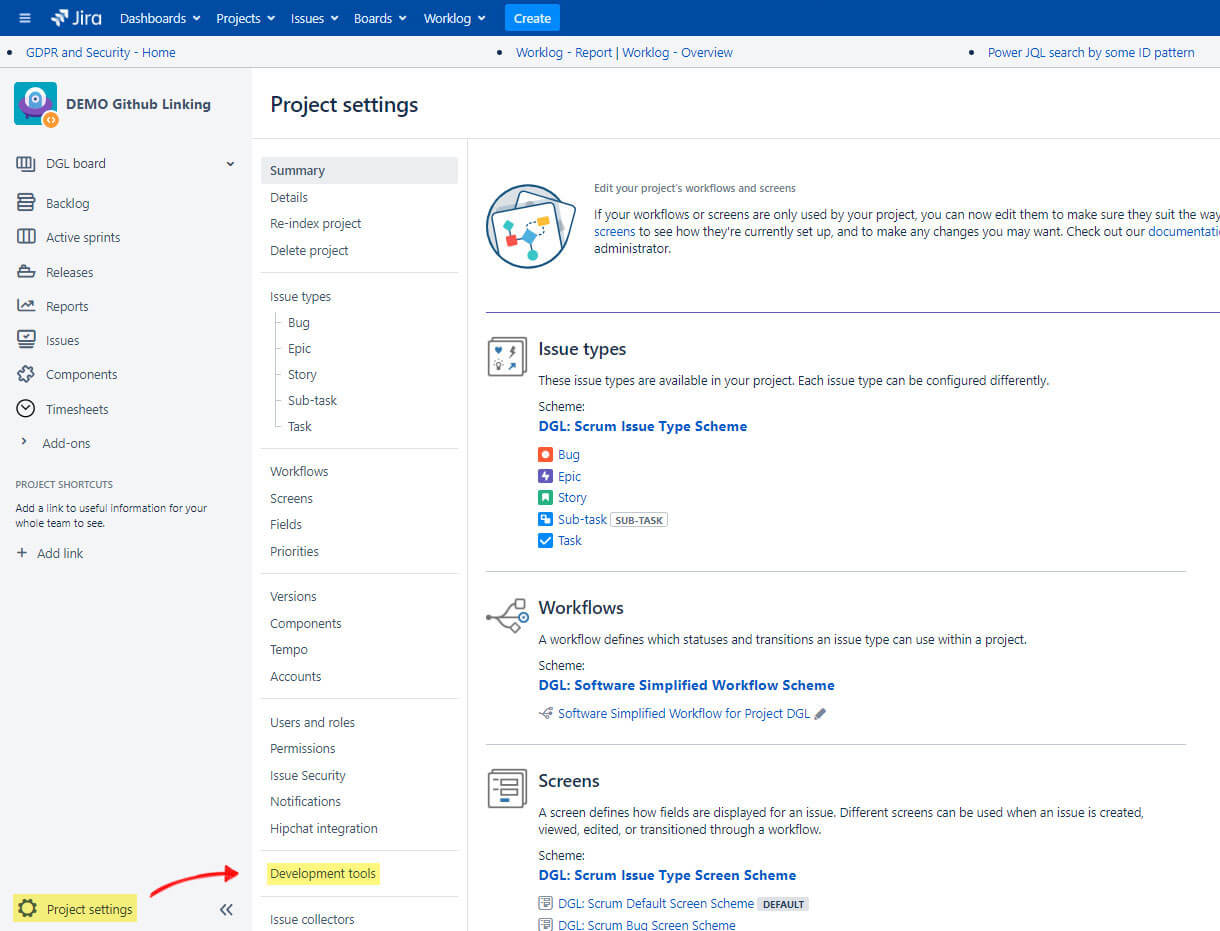
1. First, we need to link the Jira project. Click “Project Settings“→ “Development tools” (bottom left)
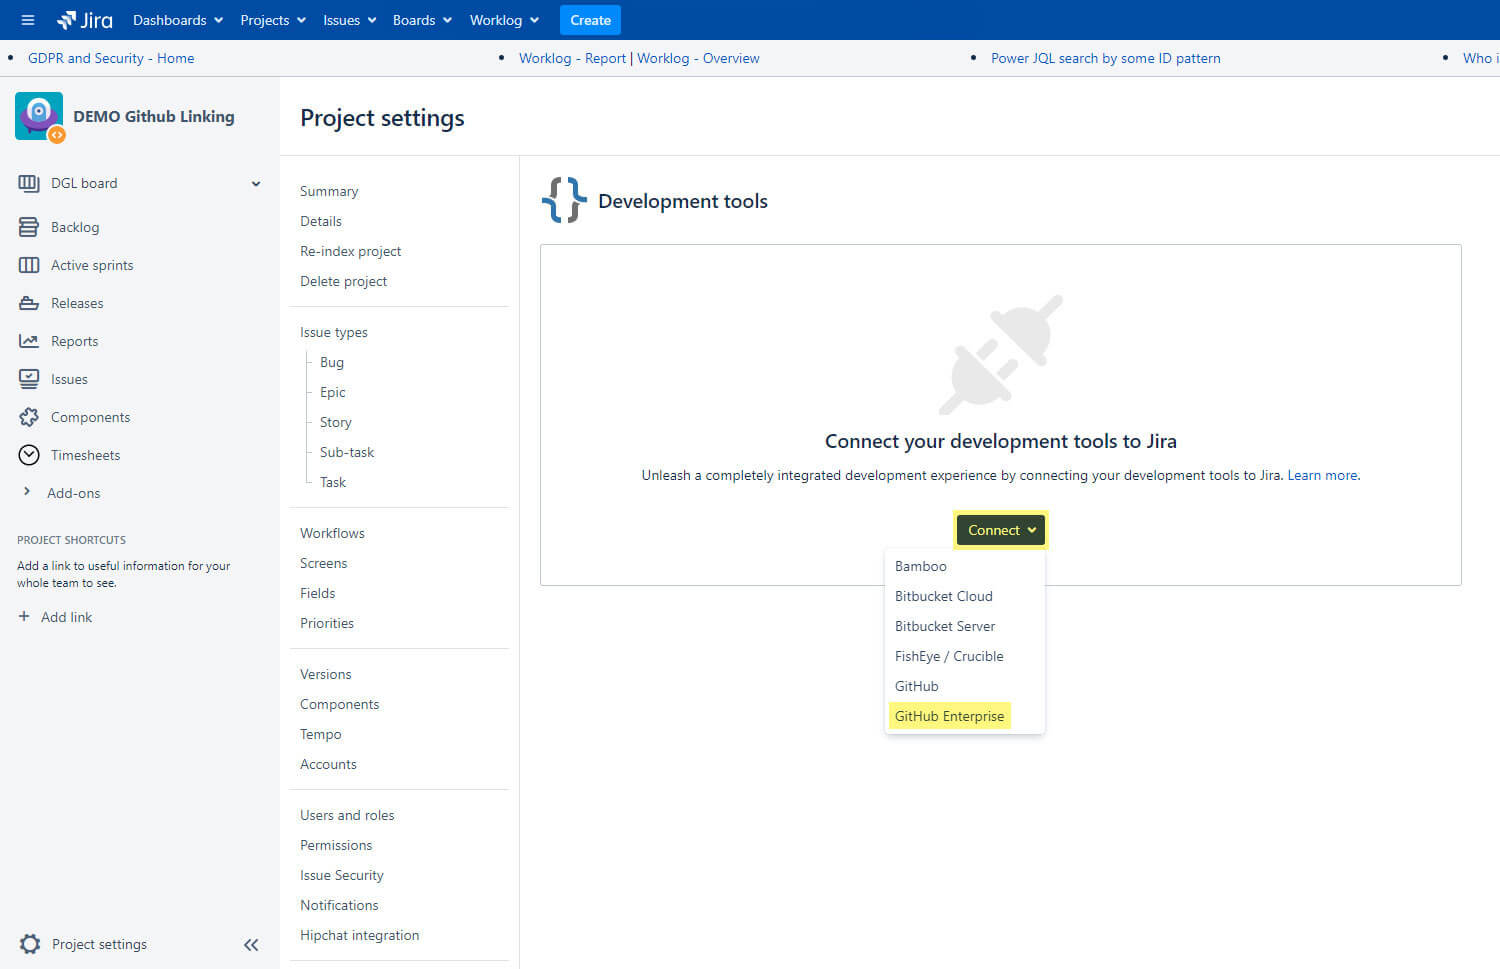
2. Click “Connect” and select GitHub Enterprise
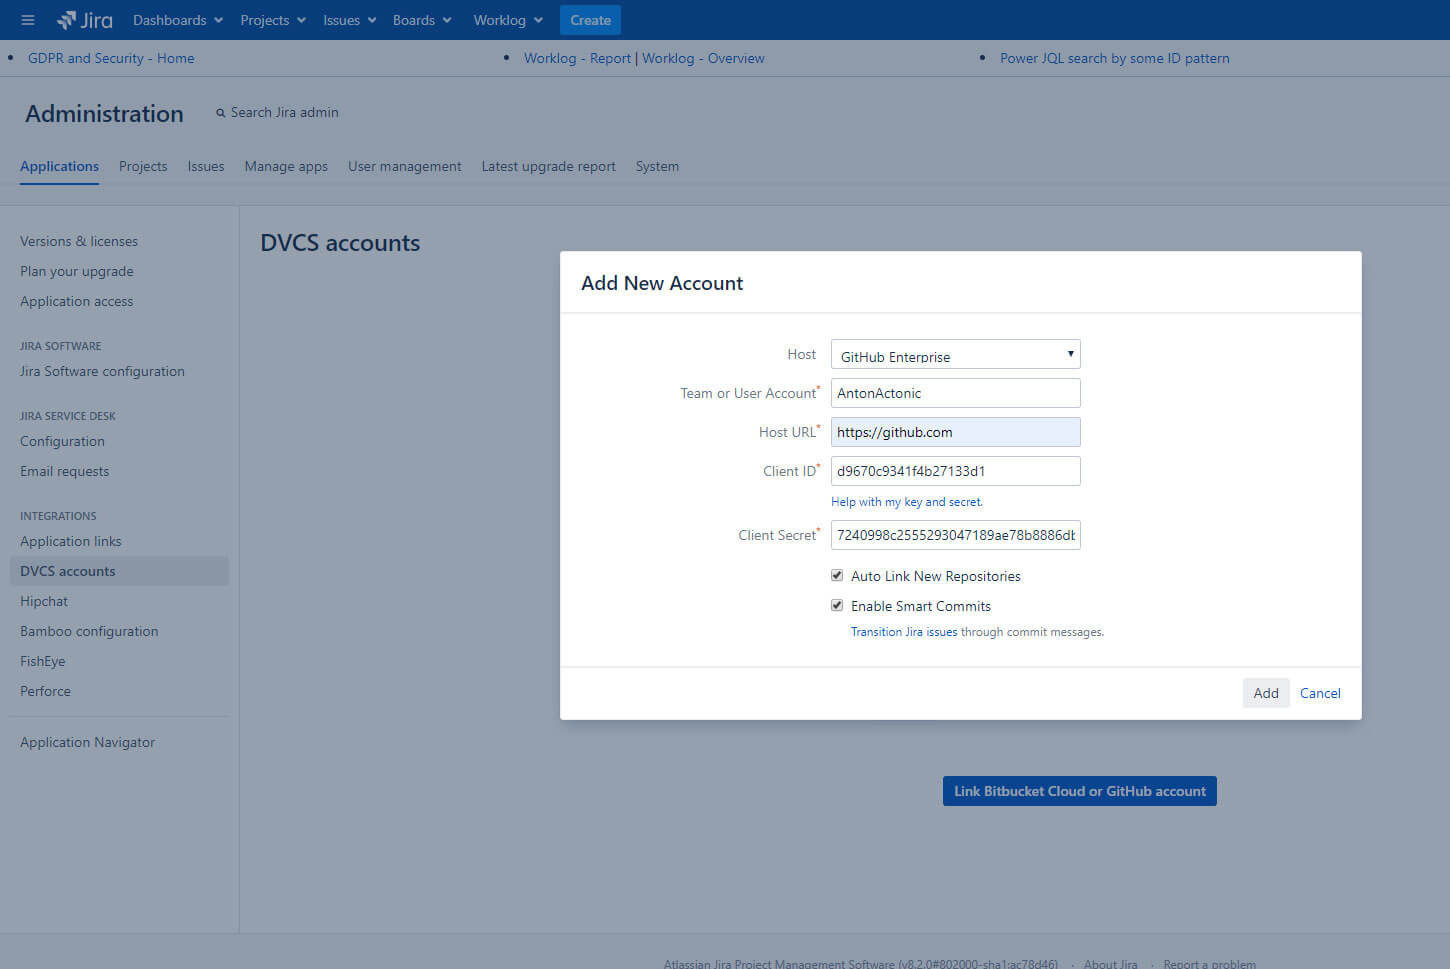
3. Enter a Team or User Account = Name of the GitHub account, which is generally related to the repository (in our case, it’s “AntonActonic”)
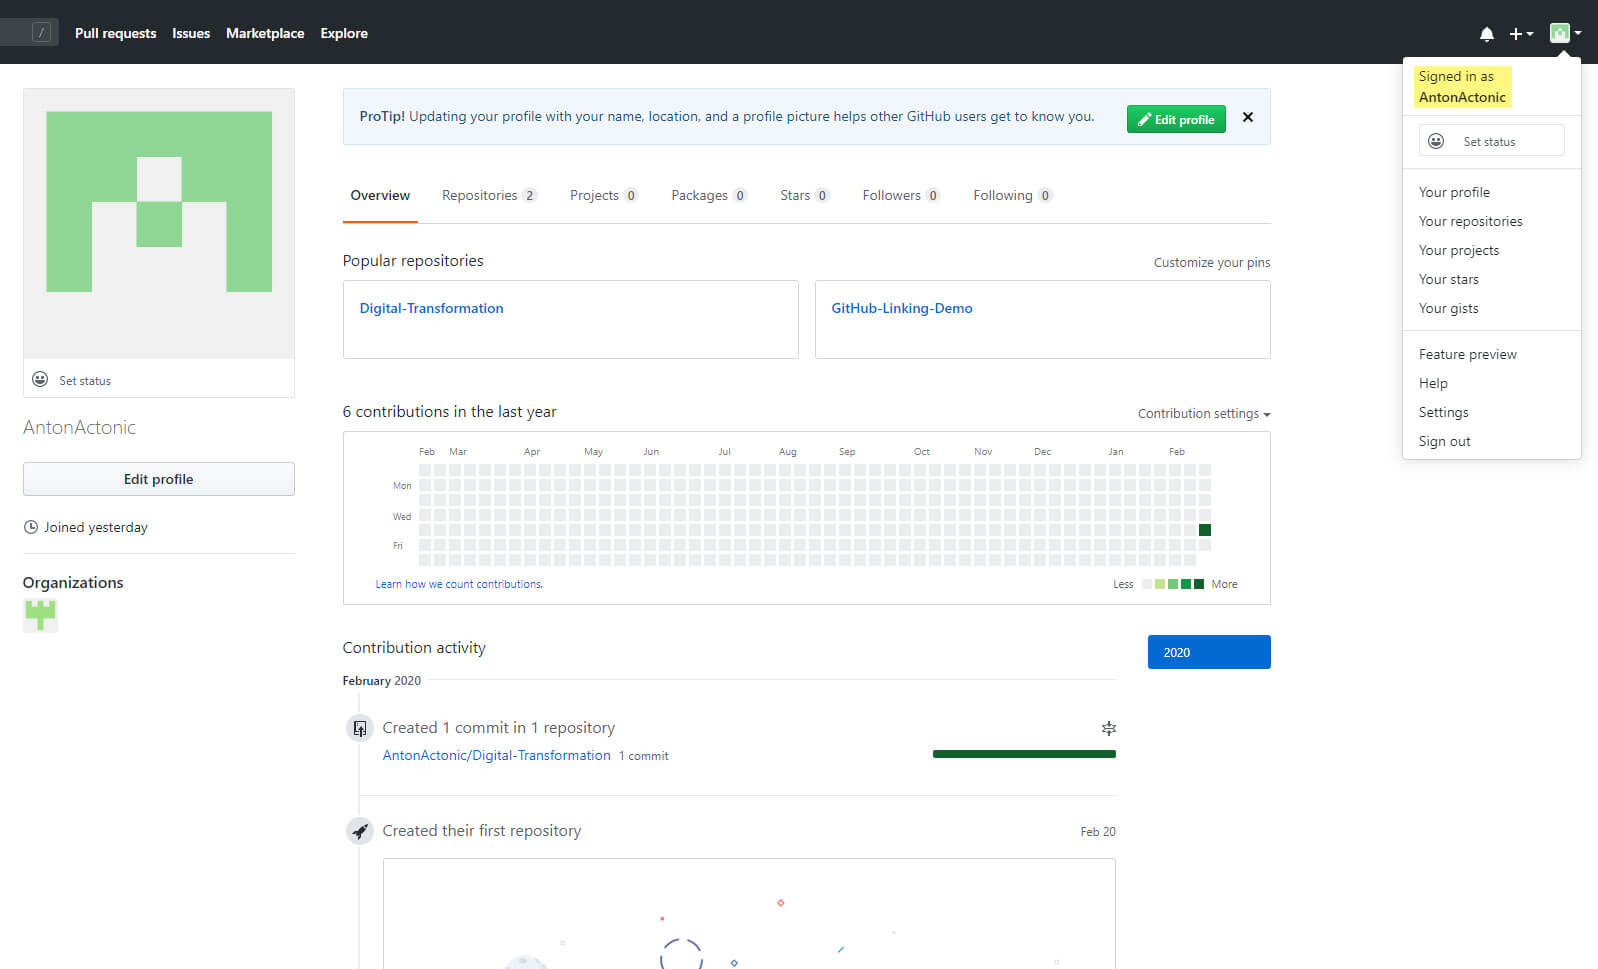
4. Host URL = “https://github.com” in this case, as we want to connect to GitHub
5. Copy your Client ID and Client Secret from GitHub (see instructions on GitHub “OAuth” above) into the dialogue and click “Add”
VERY IMPORTANT:
You should be logged into GitHub in another tab in the same window.
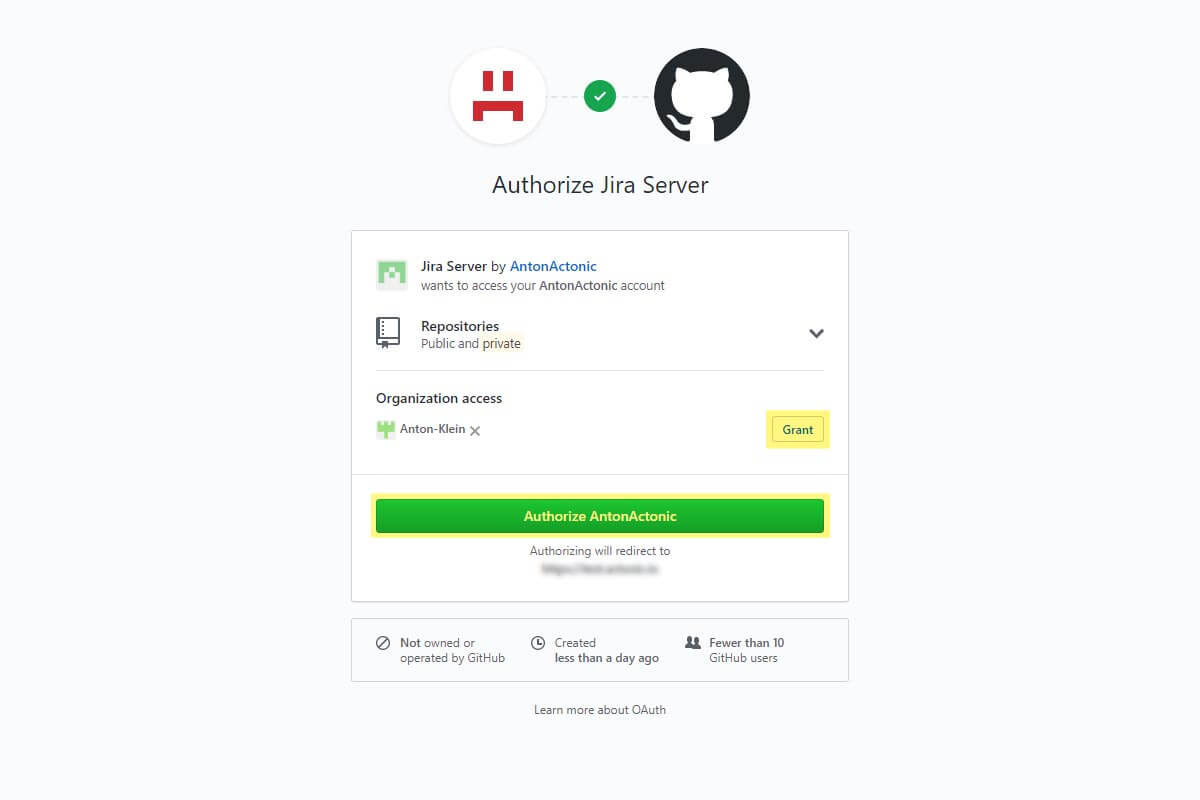
6. Click “Continue” → “Grant” → “Authorize”
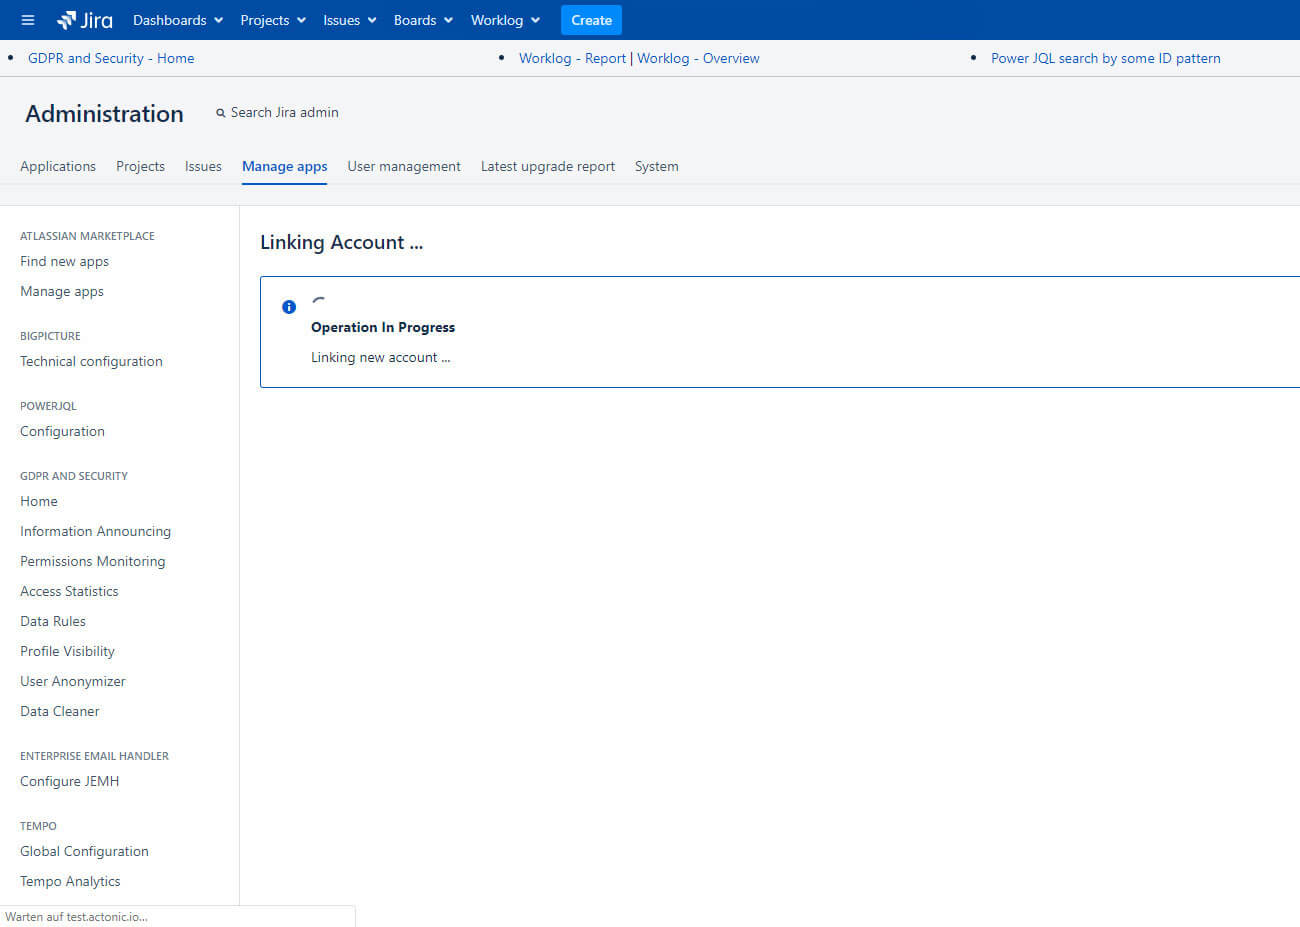
The account you have connected and all of its repositories will appear on the ‘DVCS Accounts‘ page and the synchronization will start automatically.
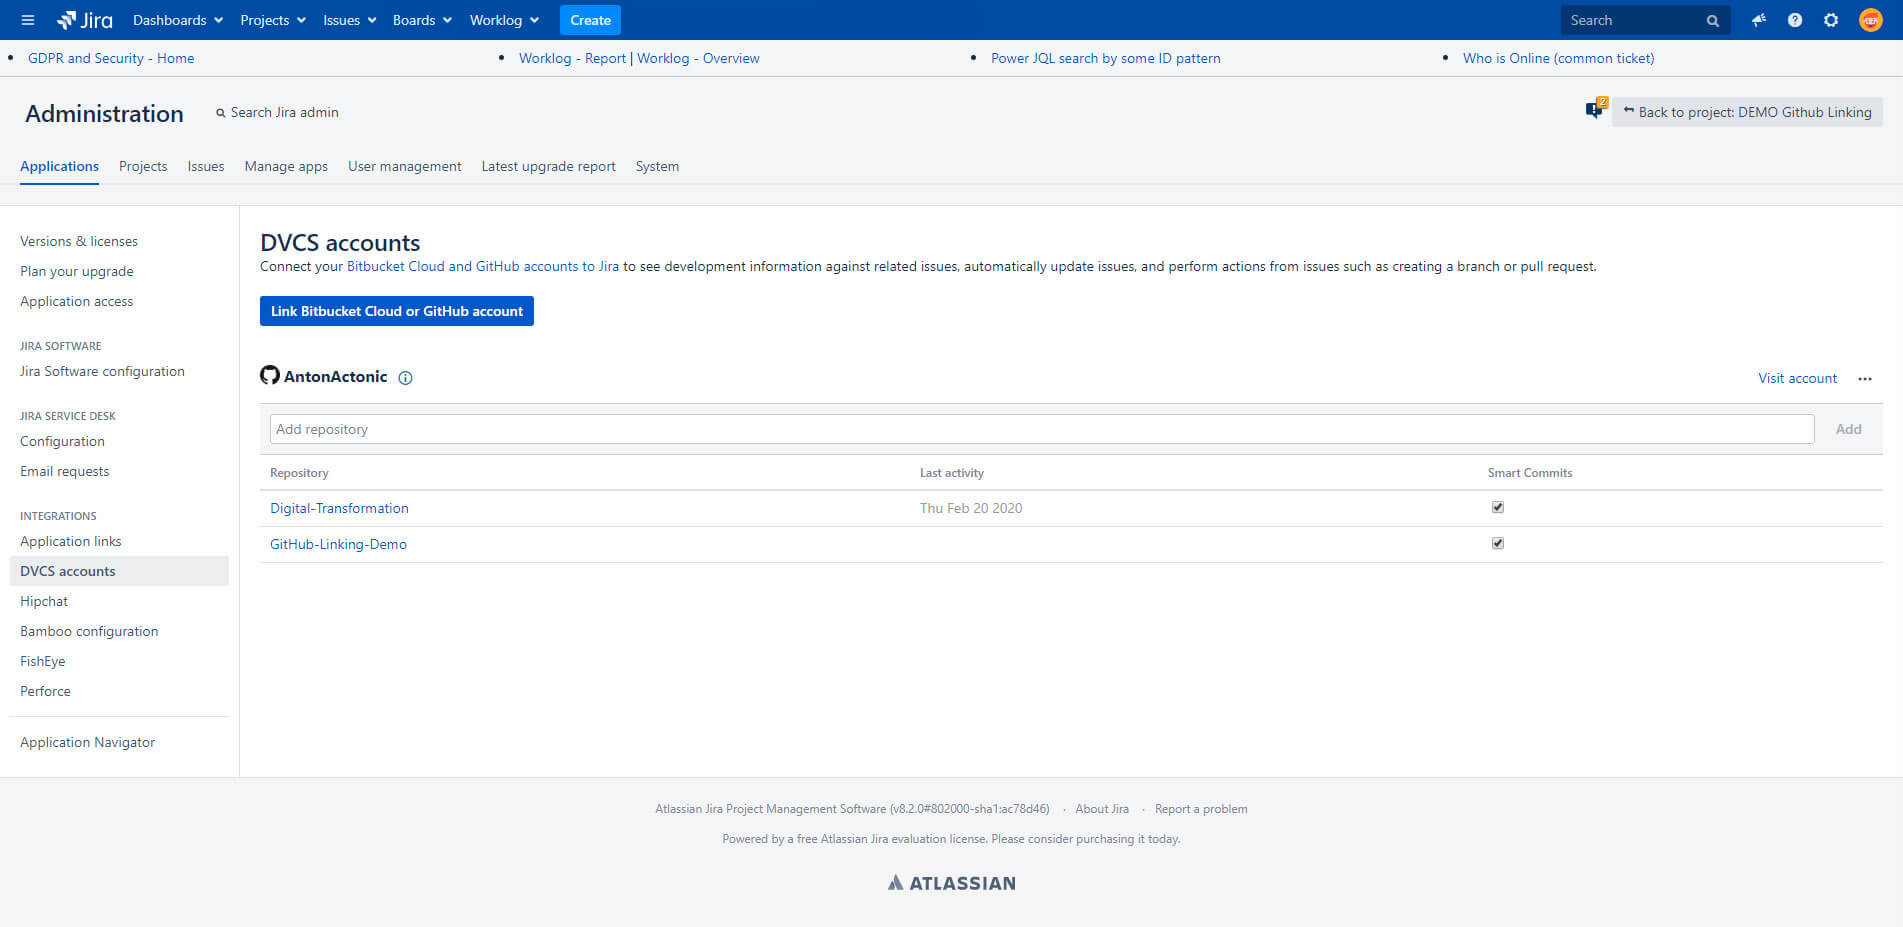
Synchronization can take up to one hour. In the case of errors, resync individual repositories.
In the project settings, it should look like this:
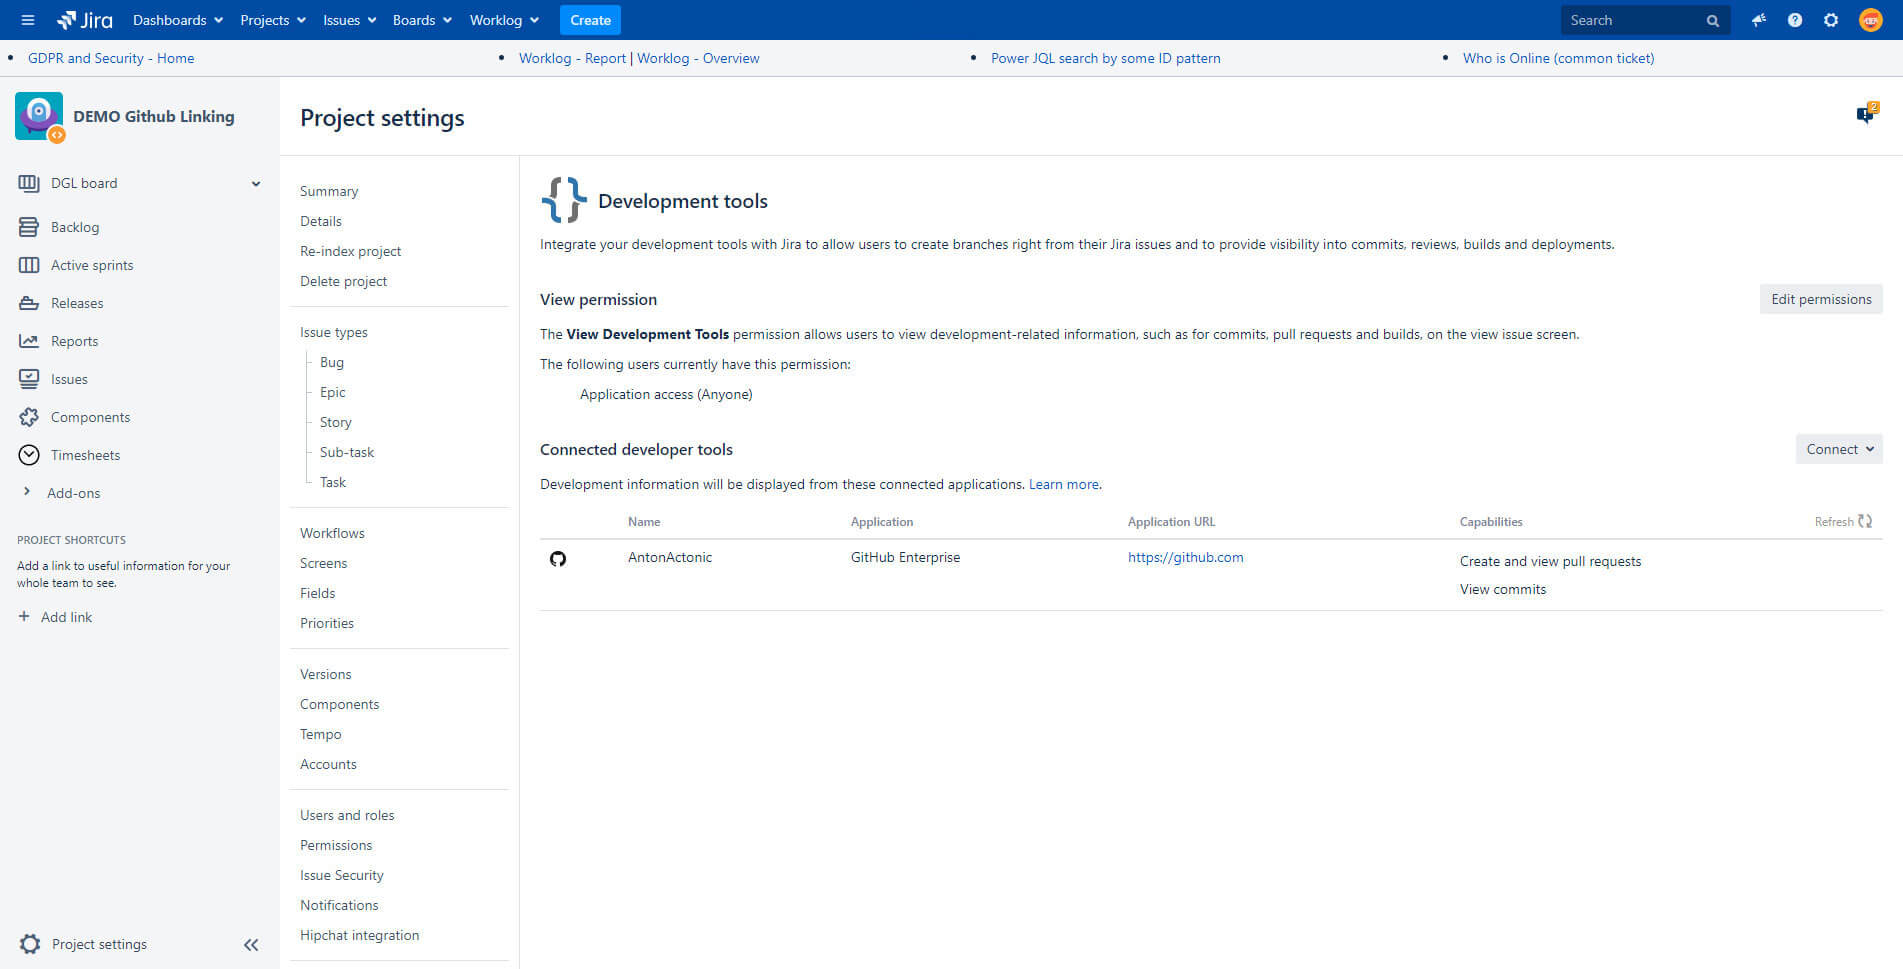
And that’s it! When you have completed all the steps, you will have access to your GitHub repository directly from inside Jira.
We hope this tutorial was useful to you. If you have any questions, please contact us.
Check out our other articles:
- Safe Password Management For Users And Administrators
- CCPA vs. GDPR: data privacy laws in Europe and the USA
- 5 tips to make work from home work for you
- Video Tutorial: JQL Advanced – Enhanced Search Queries in Jira
- Be SAFe, Part 1: Core Principles and Benefits of the Scaled Agile Framework
Let’s stay in touch!
Follow us on LinkedIn, Facebook and Twitter to get regular updates, tips and special offers.

 Request